Tactical Homesteading: Your space and its use

This article is part of a series discussing if Homesteading is right for you, and the advantages and disadvantages of more rural living.

In the last post there were several considerations about the location of your homestead. Commuting and telecommuting, distances you can tolerate, a more isolated lifestyle, infrastructure needs, and risks and resources. In this segment, let’s consider what we can do with our property and how we can put the land to work for us.

Available resources

The first thing to assess is the resources already available on the land. What foliage exists, and what types of flora might be beneficial to invest in. When I purchased my property, the original owner had planted many apple trees. The advantage is I have abundant apples, but years of neglect have destroyed many of these trees and bringing them back to health has been a chore.

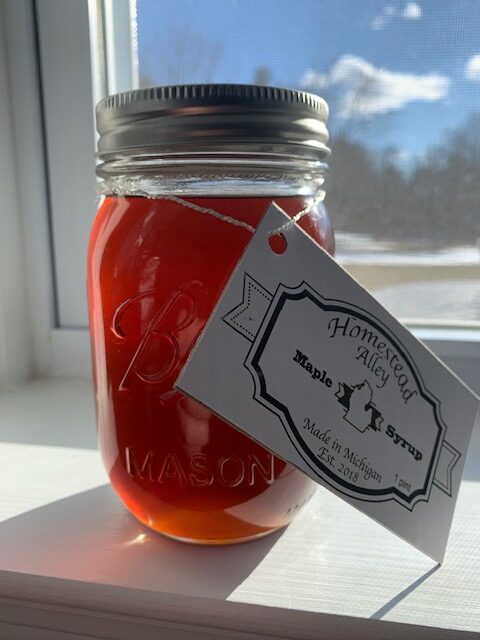
Additionally, we’ve found very large sugar maples, and made maple syrup for the first time. There are abundant blackberries. We found a large patch where morel mushrooms grow in abundance.

We have countless deer, rabbits, and cranes visit our yard regularly.

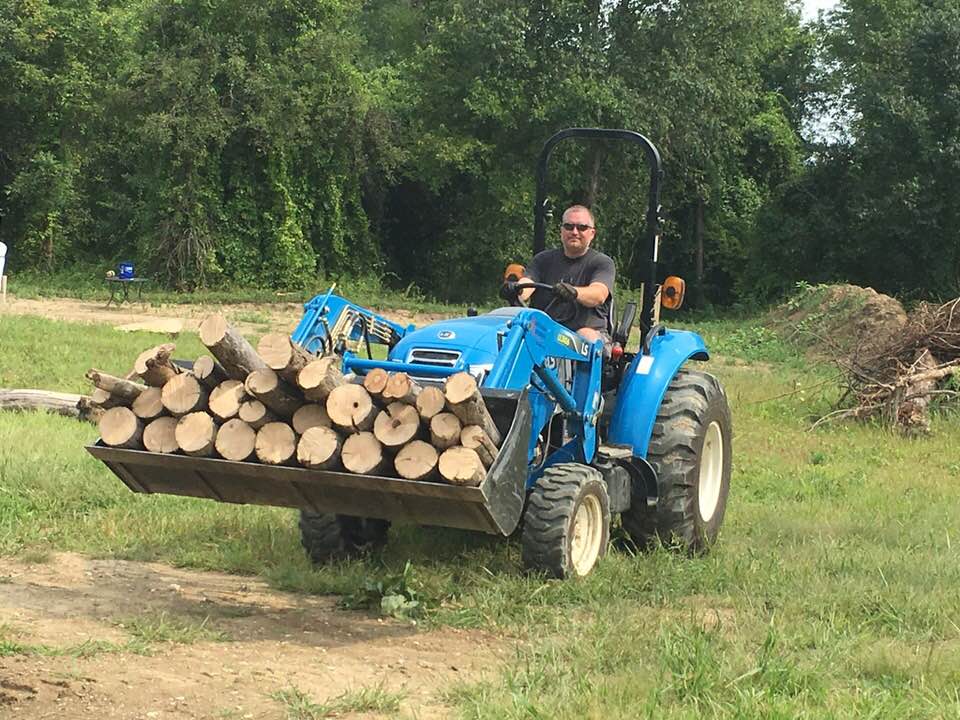
The natural woodland one would expect is a bit missing on my property; the previous owner having cleared much of it away for an orchard. I heat with firewood, and there is limited standing timber to harvest.

I have wetland on my property, and a small lake only 50 yards off my property line. A cordial neighbor agreed to water access and fishing rights.

Our first full jar of maple syrup! Tag added for fun!

Accessing the resources

Once the resources are identified, it makes sense to ease your ability to get to them. Whether making a path through the overgrowth, turning a section of overtaken orchard back into ‘yard’, or even installing a dock, getting at needed resources is very important.

When I was clearing some overgrowth with my tractor, I noticed a gap between the trees. The grass was easily 5′ tall in this area. I put my front end loader near the ground. This not only beat down the grass and prevented my tractor’s radiator from becoming loaded with debris, but it acted as a handy probe in case of rocks or stumps. The rear of my tractor was equipped with a rotary cutter, able to mow down all manner of foliage and even saplings up to 3″ thick.

As I followed the new trail, I realized it must have once been the access road for the orchard. It circumnavigated the entire orchard area, and finally doubled back to the central area I had built my house.

This trail now provides important access to the wetland, the maple trees we tap for syrup, and out to the corners of my property.

Start grooming the land

Similarly to utilizing the resources already at hand, start grooming the land for expanding its capabilities to meet your needs. For me, that was putting in a gun range. It was also clearing back much of the overgrown grapevine and Asian Bittersweet that has invaded the property.

Depending on how much land you have and the amount of work you want to do, you may leave some land overgrown and natural. It’s fine.

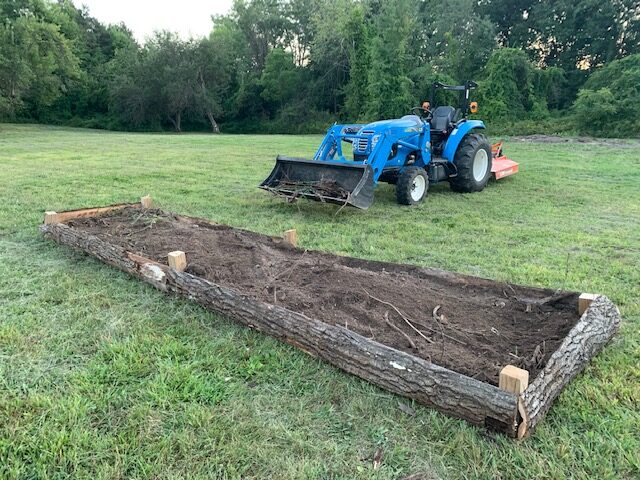
Importantly, LEARN TO GARDEN AND BUILD A GARDEN. This is the one thing I wish I had gotten to earlier. It doesn’t take much to install one, and garden maintenance can be one a few hours a week. The self sufficiency gained is very important as you get real, tangible results after only your first season.

Look over your garden and revel in the self sufficiency it will one day provide. No HOA Member telling you the tomatoes are ‘unsightly’, or the sunflowers are bringing too many bees to the area…

A 16′ x 4′ raised bed garden

Assess your needs

Now that you have something started, grow into it. Trying to feed a family of 4 with just what you grow, and hoping to accomplish that right away, carries a high chance of failure. Weeding the garden is hard at first. What is food and what is unwanted. How hard is it to tell? Why does my back hurt? You definitely have the energy for a smaller garden, and can work your way up as you gain experience.

Within a couple season, you’ll have a great idea of what your family likes and dislikes, what you might be able to sell, and what grows best in your area. Use that knowledge and focus on it; just don’t focus to the exclusion of other things. You family has dietary needs, both nutrients and caloric intake.

After a couple years is the time to truly start to assess those needs and expand for them.

Building infrastructure

Whatever you add, you will likely need equipment to upkeep it and make it thrive. IBC totes allow you to store water for the long haul. This is great for gardening.

If you are making syrup, a network of tubing and a way to route it might need to be thought up. Trees might need pruning while you know what branches are healthy in the summer.

I built a small shed for my gun range. No more lugging targets, pylons, staple guns, and other equipment every time I go out there.

Find the experts who KNOW each topic. Trade them your knowledge or pay them.

This is a marathon!

Remember, you will not achieve self reliance and sustainability overnight. It will take a couple of years just to feel like you’ve gotten started. A few more to feel like you’re thriving. Along the way, you are getting better. More knowledgeable. Wiser. You’ve worked, and know what works. Things go from a “That’s impossible!” to “Gimme 5 minutes” pretty quickly.

Maintenance: The not-so-glamorous byproduct of preparedness

There’s a thrill coming home with a new firearm, a new pack, a new radio, etc. Preparedness aficionados love new gear associated with their lifestyle just as much as a golfer loves his new putter or your rich dentist loves his new Corvette on track day.

Even before the thrill of coming home with New Toy, we tend to have a great time comparing specs, reading reviews, and optimizing our kit for its intended role. What optics will work best on the new Glock? What kind of range can I expect from this Yaesu handheld? What’s the best steel for my new pocket folder?

What is not as glamorous or exciting is the maintenance required for such things… For most, it isn’t even considered. But, with each piece of new gear, we must carefully ascertain maintenance needs it will require.

Preparedness must be as much about the learning of, and maintenance of gear, as it is acquiring new gear or new skills.

I recently moved to a 13 acre parcel of land in the ‘far suburbs’. This was done to get away from HOAs, provide a more semi-rural experience for my son, and to start down a more self-resilient lifestyle. I am slowly doing that.

In this effort, I needed to get a compact utility tractor. This is the class of tractors that have a front end loader, and can pull basic ground-engaging implements like rakes, rotary cutters, a rear blade, and more. It was the most phenomenal New Toy I’ve ever purchased, and it changed my capabilities from “I’ll never be able to get that done” to “Eh, gimme 10 minutes…”. In the first year of ownership, I cleared well over an acre of very heavy underbrush in an ancient apple orchard to a cleared area with the apple trees remaining. This year, I’ll likely clear another couple acres. I also cleared snow from my 0.33 mile driveway and private road, moved multiple cords of firewood, and more.

To a preparedness enthusiast (I despise the word ‘prepper’) this tractor represents so much capability to turn my land into an investment that will serve my family and further my goals to a resilient lifestyle. Running it is fun, getting work done on it is beneficial, and the experiences of doing these things ourselves is very fulfilling. Imparting this can-do mentality to my son is priceless.

The tractor takes maintenance. Every year I have to change oil, oil filters, check hydraulic fluid, grease over a dozen joints, adjust settings, clean air filters, and more. Every few years I have to change over 10 gallons of hydraulic fluid and a filter, bleed these systems, maintain the diesel filters, and other things. The attachments need basic maintenance as well. It doesn’t take a ton of time to do any one of these things, but it does take some. Doing them all can be a day of work.

Likewise, I have that handheld Yaesu radio in my pack as well as a backup battery for my smartphone. I have to remember to keep them charged. The optics on my bug out rifle? I need to test them and swap batteries at regular intervals. Got your water bottle full on your Get Home Bag? How long is that good for?

Organizing maintenance

If you’ve taken our Emergency Preparedness 1 class, you’ll remember that each threat component should have a corresponding matrix of activities. (If you haven’t taken our Emergency Preparedness 1 class, take this time to sign up here.) In each category, we do a pre-threat rundown on things to get, get trained on, and maintain so you’re prepared for an event. The maintenance must be part of that pre-threat rundown.

Power failure threat matrix

Here is a page from my threat matrix for power failure. As an aside, I am still working on my threat matrices as well since I moved, and am using it as an opportunity to learn Microsoft OneNote. OneNote is an excellent program for data organization and after the ‘structure’ of the program is understood, is intuitive and versatile. As I transpose info from my previous Excel sheets and reassess for my new home, I am populating more in this OneNote file.

In my Power Failure threat matrix, my task of “Ensure flashlights remain charged” is a daily, weekly, and semiannual task. Why? My tactical flashlight gets tested every morning as I put it in my pocket. Just a short on/off to ensure it works. Weekly, my bedside flashlight gets recharged. Semiannually, the batteries in these get replaced whether they need it or not. These entries in my threat matrix get added to a Maintenance page in the program where they are all listed out; all maintenance items from all tabs. I then have a Log tab where I record what I did for each (though I tend to keep daily and weekly items off it, just too much documentation for no benefit).

Once the threat matrices are complete for all threat components, we’re left with a list of what items require maintenance. Having this list is nice, but we still have to make it a part of our routine.

I’ve opted to use Microsoft To-Do on my iPhone. It allows for tasks, subtasks, recurring tasks, and more. It is comprehensive enough for in-depth task details but still very user friendly. Microsoft did a great job with this. If you have a preferred task manager that you use, go for it. I highly recommend one that allows recurring tasks, though, since that is the objective of this exercise.

Screenshot of Microsoft To-Do task manager

It can take some time creating useful To-Do’s from each maintenance item, but once they’re in your list, it is far easier to make emergency preparedness maintenance items a part of your routine.

Another important thing to remember is to create a Go-Bag or Get-Home-Bag inventory as well, and ensure you have covered maintenance items from that. In my GHB, I have the Yaesu handheld radio, as well as a battery back up for my iPhone. I have the recurring task of charging these weekly. I have some freeze-dry food that I swap out annually, and a water bottle that I cycle the water on weekly (it is not commercially sealed). In my full Bug out Bag I have more items, including testing and swapping optics and sights batteries.

Take away:

Is any of this as glamorous as posting your new AR-15? No. Is it as cool as Instagramming yourself eating a grub or bowdrilling a fire? We prepare to help ensure an uncertain future is at least a stable future through risk reduction. As such, it is just as important to pay attention to upkeep on the preps you already have as it is to get new preps. Without proper maintenance, your preps are in an uncertain state. Just like the condition we are hoping to avoid.

Lessons from the under-prepared

Originally published on 16FEB2011 for Examiner.com

K&B, LLC co-owner and instructor Don Alley is a martial arts, personal protection, and emergency preparedness writer. Many of his articles originally appeared in Examiner.com. As these articles are able to be retrieved from old web caches, they will be posted here.

The power goes out in Livonia. It’s 7 p.m. in February, and it’s already dark. The television our example family was huddled around has dimmed. After a few moments, their eyes adjust to the new light level, and a flashlight is found at the bottom of the junk drawer. With a quick twist of the bevel the little two AA battery lights up to provide a meager amount of light. As the room is scanned, the little light goes out leaving the family in the dark once more. The batteries in that thing were three years old, never replaced since the thing was bought at the Do-It-Yourself store on sale. After much fumbling, raiding a kid’s toy for some batteries while wishing fresh batteries were in hand, and using the dim light of a cell phone screen for illumination, the little light is operational once more.

“Daddy, it’s getting cold in here. I’m scared.”

The furnace ignition runs on electricity, as do the blowers. With the 22° F temperature outside, with lows dropping into the teens, the house’s insulation will not hold in the warmth for long. After this half-hour ordeal, it’s time to consider the power won’t be back on tonight. It’s time to get to a hotel.

“Honey, I’ll get the kids packed, you make reservations”, the wife says.

The husband agrees, and goes to the computer to look up the nearest hotel and the number. Of course, the computer is not working, and the cable modem is down. Where’s the phone book? Do we even have a phone book? Never mind that, just getting to the hotel should be enough, they have rooms.

After everyone is packed for the night’s stay at the hotel, the house has dropped 10 more degrees. Loading everyone into the car, the garage doors are opened… wait… there is no power. They aren’t opening. Getting out, pulling the emergency handle and lifting manually, the car is finally clear to be taken out. Lowering the garage door, the manual pull cord doesn’t seem to snap back in place.  Back inside the garage to shut it. The handle is finally pushed back in place so it locks into the automatic opener’s track.

Walking through the house to the front door, the husband exits and goes to lock the door. The keys are in the car. After getting the keys, locking the door, getting in the car, and going, it’s been over an hour, and probably longer, before the family is on the road.

Add in rounding up multiple kids, worrying about pets, and other concerns, this time could easily extend into two or three hours, only to arrive at a hotel that is full, or doesn’t allow the family cat.

This example has played out countless times in the southeastern Michigan as well as any metropolitan area. There are so many “oops” moments in the example above, yet they are continuously repeated time and time again.

In the example above, simply routinely changing batteries in the emergency flashlight could have saved 20 minutes or more. Having multiple flashlights stashed in various rooms will cut down on the “zombie walk” through the house while searching.

Having wood for the fireplace (if the home is equipped) or a decent fixture for gas fueled fireplaces can take the edge of a winter night without power. Knowing how it works is essential. Without a supplemental heat source, having a set time to wait for the power to come back on before deciding “bug out” to a hotel is a good idea. Worst case, some money is spent on a room and the kids can enjoy the pool.

Having an actual phone book can be an indispensible resource. Additionally, use some post-it notes to mark off certain anticipated things, such as hotels, the pet’s veterinarian or kennel, the local urgent care, etc. Cell phone towers usually have back-up power, so make the necessary calls quickly before too much cellular traffic makes it difficult to get through.

Having pre-prepared bags with a couple changes of clothes, toiletries, small reserve supplies of medication required, a few comfort items, and a small book of other important information can eliminate the packing-up phase. Having a supply of cash in the bags can help buy needed items when the credit card readers aren’t working.

Knowing what devices in the house run on electricity and how to operate them without electricity can save time and headache. During a situation is not the ideal time to learn this, knowing and practicing ahead of time is. How hard are the garage doors to disengage and reengage from the automatic system? Does the house alarm have a battery back-up? How does the water get shut off and pipes drained so they don’t freeze? Which one is that handle? Is the sump pump going to work? Will there be flooding?

What hotels are in the area? Were they affected as well or do they have power? Do they take pets? Will they in an emergency such as this? What’s the best way to get there?

The fact is, there are actually very few “emergencies” in our lives, but lack of preparation or emergency equipment elevates these situations into far more uncomfortable or dangerous scenarios. Having even basic preparations for simple scenarios can save a lot of discomfort, injury potential, and worry.

Maintenance for martial arts tools

Originally published on 06SEP2011 for Examiner.com

K&B, LLC co-owner and instructor Don Alley is a martial arts, personal protection, and emergency preparedness writer. Many of his articles originally appeared in Examiner.com. As these articles are able to be retrieved from old web caches, they will be posted here.

Many martial arts require the use of training tools, wooden sticks shaped like swords or knives, or the weapons are actually wooden, such as the staff, nunchaku, or tonfa. As training tools, we rely on these to both practice in techniques and stand up to the rigors of martial training. For some, the training tools are kept in the car during the day, as students go right from work to their dojo. So, these items may experience severe temperature cycling in summer and winter. To make our training tools last as long as possible, it is important to adopt an inspection and maintenance cycle for them.

  • Prior to each use give the item a once over visual and tactile inspection. Ensure there are no splinters or other irregularities, such as cracks, that might injure someone or be a sign of impending breakage.
  • After each class, ensure the item has not developed any splinters or cracks that will make it unsafe to use. If it has, fix it as described below, or replace it.
  • Twice a year, treat the wood of the training implement with linseed oil. The linseed oil permeates the wood, keeping the implement from becoming too dried out and brittle. This will help prevent cracking and breakage.

For the semi-annual treatment, consider using the following steps:

  1. Buy a container of linseed oil. This generally runs about $6-10, and will likely last your entire martial career. Buy vinyl or other protective gloves. Buy rough and smooth sandpaper.
  2. Look over the implement carefully, noting any splinters, rough spots, cracks, or other anomalies.
  3. Clean the implement to remove any contaminant.
  4. Sand out any splinters or rough spots. Resist the urge to use a power sander. One’s hand is what goes over this item’s surface over and over again, so it should be a hand that holds the sandpaper. This ensures an even, circular sanding surface, not the flat surface a power sander provides. Start with rough sandpaper if some major irregularities are observed, then switch to fine sandpaper to restore the wood’s smoothness.
  5. Wipe the implement down with a dry paper towel to remove sawdust.
  6. Put on protective gloves.
  7. Fold a couple paper towels on 1/4 so there is a thick “pad” of toweling.
  8. Pour a generous amount of linseed oil into the paper towel.
  9. Apply the linseed oil to the implement be stroking the paper towel along the full length and end of the implement. The wood has to absorb the oil, so generous coating should be applied.
  10. Hang the implement in such a way that the linseed oil can soak in well, such as on a couple hooks made from wire hangars. Avoid setting it down on a towel or paper towels, as this will wick some of the linseed oil away.
  11. CAUTION: Dispose of the linseed oil soaked rag carefully. Linseed oil heats up as it dries out, and can create enough heat to ignite a paper towel. Dispose of linseed oil soaked rags with this in mind, such as in a metal can placed outside and away from other things, or a water filled container.
  12. After a few hours (I usually let it sit overnight), wipe off the excess linseed oil still on the surface of the implement. A paper towel stroked over the surface of the implement is all that is necessary. Dispose of the towel as above.
  13. After a few more hours, repeat the above step, wiping away any additional oil that has not absorbed into the wood.
  14. Ensure grip areas are not slippery. Continue wiping away any extruded oils as necessary.

Once complete, the implement will likely have a more pronounced and vibrant woodgrain pattern, and the oil will help the wood resist becoming brittle, which can cause splintering and breaking. This will prolong the implement’s service life, as well as reduce the chance of injury to ourselves and our training partners.